
Been using the car a bit especially on the bright sunny days. However these days haven't been as enjoyable due to the water temperature being low and bugger all heat coming from the heater as a result. Therefore I whipped out the thermostat and fitted another one - correctly this time. For some reason I had fitted the o ring first then the thermostat so this time it was fitted as per the manual. Took the car for an evening blast and the temperature gauge was reading higher and there was some heat so fingers crossed.
I managed to ground the exhaust again on the drive and thought I'd better check how things were looking. The U bolts joining the main box to the hockey stick pipes were pushed round and touching the sump. Time for some new low profile ones before the sump gets holed. They arrived today and were quickly fitted along with some exhaust wrap in an attempt to seal the exhaust better. While under the car I noticed that the speedo transducer pickup in the gearbox is leaking oil so I'll do the exhaust system properly when I've sourced a replacement seal or pickup.
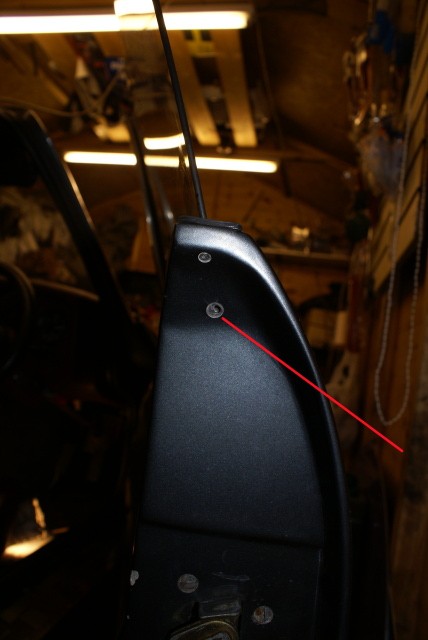
I had a few hours to kill today plus it was raining so out to the garage to do some fettling. A while ago I purchased some replacement window channel at a kit car show. It was from Woolies Trim and is their universal window channel part number 317. So todays task was to replace the channel and also check out the door that is drooping.
This is the guide that needs the new channel.

It is secured by two bolts from underneath the door and had 10mm nuts inside. There should also be a shortened countersunk screw into the top of the channel in the end of the door but on my offside door this was missing.
Replacing the channel was just a case of pulling out the worn channel and cutting a new piece to fit. I secured it with a dab of super glue at each end just to be sure.
I then moved my attention to the hinge and discovered that the top hinge pivot (a large 8mm cap headed bolt) was loose. A quick tweak with an allen key soon had the door running true with no droop. I found it was easier to take the weight of the door in one hand and tighten the cap headed bolt with the other. While I was at that end of the door I found that the foam covered guide for the flexible window lifting thing (can't think what it is called) was sitting in the end of the door. I'd not noticed it tucked away before I'd assumed that it was left out by a previous mechanic. It's not a small item to lose in a door as you can see from the pic. This was refitted and secured with a jubilee style clip.

Everything was bolted back together and the door now shuts with a solid thunk. Just need to do the nearside one now.
Went for a blast and met up with the Westfield guys. On the way back I noticed a knocking noise that I thought was coming from the rear. While rolling the car into position in the garage a knock came from the front. A quick check of the wheel nuts revealed that two nuts on both front wheels had worked loose - again. So the front end was jacked up, the wheels removed and all threads and nuts cleaned. Refitted them and tightened to 100Nm which is the top end of the usual wheel nut torque settings. I'll be keeping an even closer eye on them now.
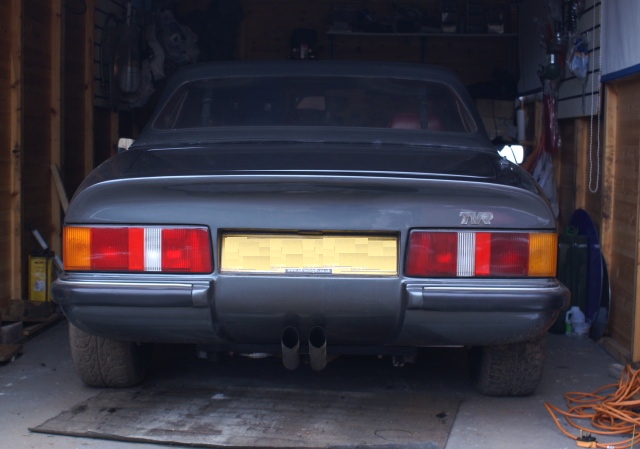
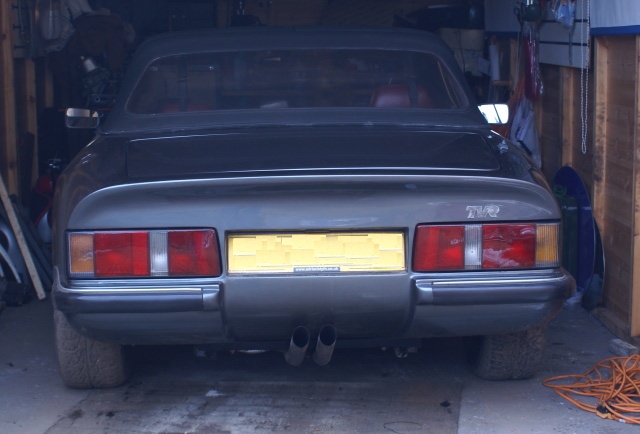
Various people have commented that Halfords can do paints for the TVR. Therefore I went out yesterday for an early drive and picked up some TVR Storm Grey paint. Get home and tested it for colour match and it is nothing like the colour of my car - too much red in the mix I'd say. Not very impressed and I'll be following this up over the next weekend. I had some time to kill today so thought it would be good to fit the new rear lights that I've had for nearly 2 years. They've been sitting safely in a box all that time but on the way to the garage I lose my grip on the box and they fall out onto the concrete. The end result is that both are cracked and not usable. Not a very good weekend really so I shut the garage and walk away before I break anything else.
Fitted some replacement rear lights yesterday without throwing them at the concrete. I went for some Escort RS Turbo ones because of the light smoke colour but now I'm not so sure. The reason for replacing them was that the nearside light had been replaced at some point and wasn't a colour match with the offside one.
What do you think? Some before and after pics.
...before
...and after
Went to Halfords to follow up on the paint issue and they list over 6 Storm Grey paints for 1991 but none of those tried were anything like light enough. Despite having been told that this is a Storm Grey coloured TVR I suspect that it isn't the case. Even the paint code didn't help them to match it.
The paint identification issue continues and I've been advised by another owner that it is Atlas Grey according to his delivery paperwork. An email with someone who worked at TVR suggested that it might be a Ford Cougar grey and if so then that was a bitch to match up.
Last Sunday after getting back from a blast I thought I'd check the ignition timing while the engine was hot. There has been some hesitancy during acceleration and it just didn't feel right. I must confess that I'd had a quick play with the timing a few weeks ago after it had been suggested that disconnecting the Idle Speed Control Valve (ISCV) would set the car into a mode where one could set the timing. I found that the idle wasn't very reliable like this and the strobe showed the timing fluctuating by several degrees. Anyway, I had tried setting it to 12 degrees BTDC with the ISCV disconnected and since then it hadn't been running that well.
This time I used the code reader and set it into service mode. The strobe showed that it was at a rock steady 6 BTDC so a quick tweak later and the timing was set to 12 BTDC. I took the car out for a blast to check the settings and it is much better. I also slackened off the alternator belt because it was a bit noisy and it now sounds better. The problem now is that the alternator bearings can be heard now so another task for another day. Also it seems that a tappet is a bit noisy and may need adjusting or else there is a slight blow from the exhaust somewhere.
With the MOT coming up I thought it was about time to deal with the advisory notices from last year. A new pair of horns is on order so that is a job for another day. Today I made do with fitting a replacement track end ball joint on the offside. While the wheels were off I repainted the suspension arms and the ARB in a more subtle black rather than the tacky silver.
The paint was now dry on the front wishbones so work continued. The steering column bulkhead bearing was sounding rough so a new 6005 bearing was fitted. As the steering column was out I realigned the UJ that joins to the steering rack to centre the steering wheel. Refitted the wheels and went for a blast. Two things were noticed - the steering is more positive on the bends and there is no vibration under braking.
I managed to squeeze in a few minutes in the garage so fitted the new horns. These were some 5 quid ones from ebay and were a similar style to the originals - just louder.
Spent a couple of hours checking the rear brakes. Adjusted the handbrake so that it comes is sooner. Had a general poke around and everything seems ok. MOT due in a month so need to sort those niggling jobs.
I'd decided I didn't like the smoked rear lights on my S so this evening they were removed. I'd picked up a pair of lights that are a matching colour and they're also newer looking so I'm happier now with the way it looks. One day I'll clean up the car and take some pics.
I've still not cleaned the car so no pics yet. Having replaced one track rod end and noticed and improvement in the steering I started to replace the nearside one last Wednesday. It wouldn't budge so I tried some heat from a propane torch but still no joy. I then left it to soak in some penetrating fluid until yesterday. Had another go but still couldn't budge it so it was time for the cutter. Out with the small grinder to which I fitted a plasma cutting disc. This made short work of the track end and soon the track rod was exposed. After a clean up the new track end was fitted and everything reassembled. A quick blast to the shops to check and the steering felt ok but no better. I then reset the tracking to 0 degrees rather than the 1 degree toe in that originally set it to. I also set all the tyres to 25psi. Today we went out for a run to the coast to test the car and it felt even better on the bends - more positive and felt like it cornered flatter. The next major upgrade will be some new shocks and springs.
During the last week I've fitted a new set of Gaz nickel shocks and springs because the original ones were now leaking. The springs are rated as 375 front and 300 rear. I've certainly noticed an improvement when going over potholes and other sharp lumps and also my drive is now negotiable with a bit more comfort. There is less squatting under acceleration and under braking the nose doesn't dive as much so I guess it is a vast improvement. I still have a feeling that I should have specified softer springs for the lumpy Norfolk roads but I'll continue to play with the damping settings and see how things improve.
The MOT went well and another pass and just an advisory that the brake fluid reservoir was between max and min. This is the only time I get to hear my S from the outside (as they do the brake tests) and it does sound good. No wonder heads turn when I trundle down the streets.
I've finally got round to doing a job that I started when I fitted the Kia front indicators. The old indicators covered the end of the rubber bumper strip but the Kia ones sit inside the recess so don't. I made up a wooden buck that fitted inside the rubber and had an end cap that matches the profile of the rubber. To make a mould I used Plasticine and then placed it in the freezer for 20 minutes to make it harder. Once the Plasticine was carefully removed it was filled with resin mixed with cut strand glass fibre for strengthening. Also a bit of black pigment was added just in case it set without any air bubbles in it - which wasn't the case.

The bumper rubber insert needed cutting down to allow space for the end cap.
Here is the end cap sprayed and fitted.
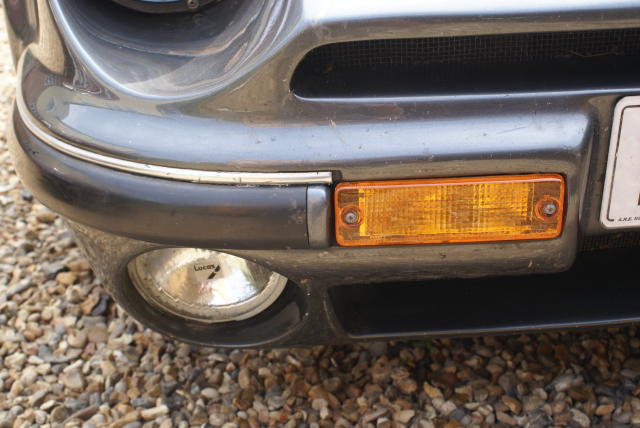
And finally a completed pair.

The leaking clutch master cylinder was getting worse and visibly dripping onto the footwell carpet so something needed to be done. I had ordered a spare master cylinder for a Landrover series 3 onwards which was basically the same size. Fitting the new one required some tweaking to get it to fit. The pipe thread on the new master cylinder was a 3/8" thread plus the thread on the pushrod was different so the clevis wouldn't fit. This was resolved by taking the pushrod from the old master cylinder and fitting it to the new one. The pipe to the slave cylinder was replaced with a new one with a 12mm male at the slave end and 3/8" at the master cylinder end. As the bore hole from the master cylinder to the pipe was 3mm I used regular 3/16" brake pipe rather than the 1/4" originally used - which I also didn't have any of.
Before fitting the new cylinder I quickly cleaned the area around the master cyclinder and gave it a quick spray with the paint I'd recently purchased - more on this in a moment. The master cylinder to bulkhead bolts were replaced with stainless steel ones and the master cylinder was sealed to the bulkhead using black rubbery gutter sealant. This stuff doesn't set like silicon sealant and is something I've used for years with great success. Here's the new cylinder fitted looking all cleaned and tidy.

The latest on the paint is that I've found a very close match in an off the shelf tin from Wilco who are my local motor factors. It is VW Storm Grey and is made by Hicote and at about £3 a tin it is also well priced. I've used it to touch up several areas under the bonnet and you can't really notice the difference there. The chip on the bonnet is slightly more noticable but still better than it was.
It's been 3 months since my last update but there are only few bits to report and no pics unfortunately.
I've been playing with the tracking on the car during the last few months. I used to run a bit of toe out on the Westfields but this makes the S3 a bit nervous down the lumpy country roads. Setting it to 20 minutes toe in has been the best in terms of stability and turn in into corners. I'm still running the old rubber bushes so I would quite expect the toe in to vanish under load.
Next I turned my attention to the ride heights and raised the rear to 175mm at the chassis rail inline with the rear wheels. The front was raised to 165mm measured inline with the front wheels.
The rear wheel have always been set to 10 minutes toe in according to my Dunlop tracking gauges, but I've always felt somethng wasn't right. Using my home made laser alignment gauges it turns out the the nearside wheel was toed in and the offside had a small degree of toe out. A lot of sweat later and 2 additional shims on the offside and now both wheels had the same degree of toe in. The Dunlop gauges showed that I now have a total of 30 minutes of toe in at the rear.
The handling and cornering has improved after the above work and it is so much more confidence inspriring to drive now. The final tweak the other day was to try and reduce the tendancy of the nearside front wheel to lockup. A few turns on the platform of the nearside front shock appears to have increased the load on that wheel and last nights drive resulted in less lockups under heavy braking.
While adjusting the shock I noticed that the radiator is weeping at the lower nearside corner. I will keep an eye on this and look into sourcing an alternative radiator.
I thought I'd better check up on the plug in cylinder number 2 that I mentioned in August 2007. I removed the plugs and number 2 is still very clean compared to those either side. I was going to swap the injector from my spare engine but these had beige injectors and mine are green. Rather than hunt around to see if they were identical I chose to swap the injectors between cylinders 2 and 3. At this rate I'll check up on it in a years time.
The S has been declared SORN so is off the road. There are a few jobs that need doing so the decision was made to SORN it for a month and crack on with them. It is sitting in the garage minus a bonnet, the rad has been removed and the cylinder heads removed. A parcel of goodies arrived from Rally Design today and that included some heavy duty engine mounts.
Need to decide whether to fit the alloy bell housing that I have while I'm this far. If I'm doing that then I might as well replace the rear crank oil seal at the same time. The front one is starting to leak so it makes sense to do them both.
This mornings task is to replace the engine mounts. Doesn't sound like a big job and certainly wasn't when I did all the chassis work. The only difference is that the body work is on the chassis and what a pain it is to replace them now. The only route to the mounting nuts was from the front and removing the ARB gave me enough room to wiggle a spanner. The new engine mounts are the 50mm heavy duty ones from Rally Design.
Just after acquiring the S I picked up a new camshaft and followers. This was finally fitted today along
with a new timing chain. I've decided to leave the bell housing alone so the engine is staying put. This
does mean that the rear crankshaft oil seal isn't going to be replaced. I'm waiting for the front seal to arrive
then I can replace the timing cover.

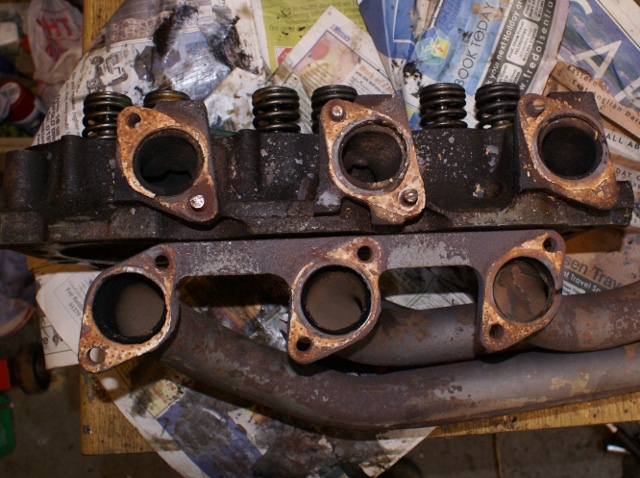
The exhaust manifold has been blowing so the gaskets need replacing. Looking at the bolts it looked unlikely that they would shift and sure enough the first one sheared. Of the 12 bolts only 4 came undone. The rest either sheared or had the heads cut off. Tomorrow I'll attempt to extract the bolt remains with the aid of the MIG welder. Failing that, then it is a case of using the heads from my spare engine.
I attempted to remove some of the remains of the bolt but the first one wasn't going to come out so I resorted to plan B - the spare engine. The heads were removed from this and put aside.
Checked the timing of the camshaft and I make it between 1 and 2 degrees out so I'll not bother timing it in any more accurately. The crankshaft seals arrived today so I can start putting the engine back together.
Refitted the timing gear cover and fitted the new front crank seal. Decided to replace the valve oil seals while the head was off only to find that the valve compressor didn't work. A quick inspection revealed that one of the links in it was bent. A bit of work with a hammer and vice had it straight again and then a strip of steel was welded on to strengthen it. Ran out of time today to do any more.
Using the repaired valve spring compressor I was easily able to replace all the valve oil seals. Doesn't sound like I've done much but it is another step towards re-assembling the engine.
Finally managed to get back into the garage and crack on. The cylinder heads were cleaned up and bolted into place and then the push rods and rockers were fitted. The tappets were then adjusted to spec. Next the inlet manifold was fitted, making sure that the corners of the V had sufficient gasket sealant to prevent oil leaks.
The rocker covers were to be fitted next but they look very tatty and rusty so were stripped of paint and are currently being treated with a rust remover.
Rather annoyingly I have lost or deleted all the pics I took when putting the engine back together, hence the lack of pics so far.
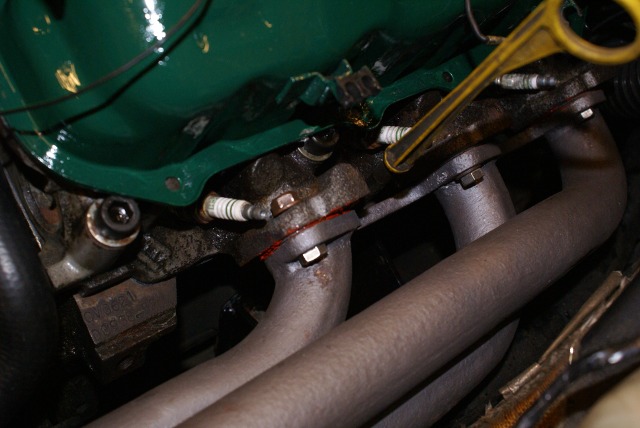
Over the last few evenings the rocker covers have been cleaned up and treated to a couple of coats of smooth green hamerite. The steel exhaust manifold has had some welding on it to build up the mating faces which had corroded. They are now fitted and fingers crossed that they will seal ok. I've used a mixture of studs and bolts to fit the manifolds and encountered one problem. The upper stud hole on no.4 cyl had a loose fitting thread and it stripped as expected. Rather than remove the head and helicoil it I chose to use a longer stainless 8mm bolt and fit a nut to the exposed thread. Fortunately it was an upper one so it was easy to take this option.
Another couple of hours spent in the garage today. Dropped the rocker covers in place to keep crud out of the engine. Will bolt these into place just before I fire it up as I want to pour some oil over the valve train. The dizzy has been fitted and a few of the coolant pipes are now fitted. I've now started to look at the radiator and how to fit the alloy MGF rad I've aquired. It looks to be an easy fit using lengths of rectangular section alloy top and bottom that have holes to take the lugs on the rad. The bottom piece will then have lugs that fit into the existing rad mounts. Side supports will be manufactured from some strips of steel that I have lying around. New fans will be required - probably 2 x 10" units to give redundancy plus they are about the height of the core. Just need to find some 10mm alloy rod and some grommits with an ID of 13mm.
Yesterday I was hoping to find some 10mm alloy bar in the local DIY and model shops but was out of luck. Instead I had to use some 10mm steel and drill and tap these to make some pegs. These are to locate the lower alloy rail into the existing rad mounting holes. The rails are about 650mm long and made from 35mm wide rectangular section alloy from B&Q. Today I drilled the larger 19mm holes to locate the MGF and fitted the grommits. So I now have both rails read and I've cut some lenghts of 50mm wide 2mm steel to lenght for the side supports. That was enough for today.
Some pictures at last. Here's the lower rail for the rad. The pegs are held in by mushroom headed bolts and the grommits are fitted.

The rad located in the lower rail and resting in position and the top rail fitted to the top mounting pegs.
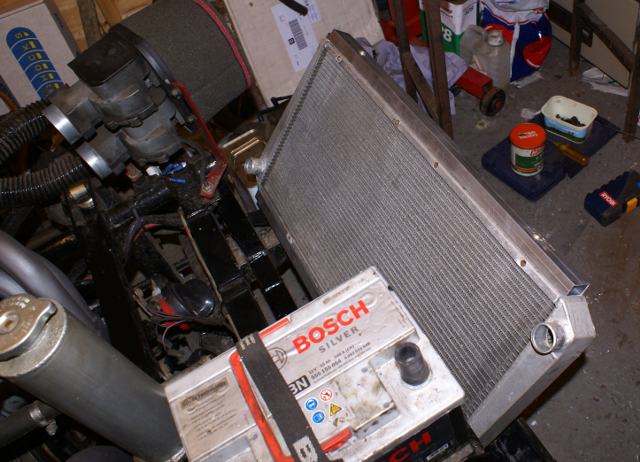
Since the last update all I've done is complete the rad bracket and bolt it into position. I've been waiting for parts to arrive - cooling pipes and adapters from Burton Power being the main item. While I've been waiting for these to arrive I've sourced a SPAL fan. I've also been collecting some relays, bases, fuse holders and some wiring for the headlights. The plan is to fit some relays for dipped and main beams and hopefully improve the lights. I also have some waterproof connectors to join the main lighting loom to the bonnet monuted lighting loom.
Tonight I fitted the bracket for the relays and painted it. Couldn't do much more while the paint was wet so stripped the loom tape ready for the next day.
Done a little bit more on the wiring today. Took the original main and dipped beam feeds and terminated these at the relay sockets. Connected up the fused power feeds to the relay and connected the output wires for the lights. Rather than feed the earths back to the chassis earth point I welded a new chassis earth point on the top front cross member. Repainted the chassis around the welding so wet paint stops play again.
Spent a few minutes in the garage doing some more on the wiring. The loom has all been taped up as far as where the waterproof connectors will go and the earth leads from the relays and secured to the new earth point.
Fitting the radiator fan was the first task of the day. I secured some smaller rectangular section alloy strips from the top to the bottom of the rad. They are glued and rivited in place and appear sturdy enough. The fan was then connected to these strips using self tappers. I wanted to use some rivnuts but they were too long for the alloy sections and I didn't want to drill a hole through both sides.
Yesterday the TNT man arrived with the pipes from Burton Power so I started connecting them up. to join the two 90 degree elbows I used some alloy 32mm tube. B&Q do 32mm ariel pole for under a tenner for a 6 foot length. To stop the pipes popping off a bead was formed using a modified Oyster tool. This idea originally came from the LocostBuilders.com website so I can't take credit for it.
Not much doing today so spent some time in the garage. All the cooling pipe work is now connected and secured. The rocker covers have new gaskets and are bolted into place. The front section of the wiring loom is now secured and the fan wired up. The alternator is now fitted so all that remains is to connect up a few wires, fit the exhaust and the fill the rad.
Here is a pic of the Oyster tool that was used to form the beading on some pipe. There was originally a hole for the dimple to press into but this was opened out to a slot to enable a more continuous bead to be created.

Into the shed with a large mug of coffee and tackled the last few bits of re-assembly. Fitted the plugs and leads and connected up the coil. Filled the cooling system then tightened a few pipes to cure leaks. Now it was time to connect the battery and fire up the engine, except it didn't. Removed a plug and it was wet with fuel. Placed it on the plenum and cranked the engine and had a very good spark. Only thing left was timing so I removed the offside rocker cover and set the engine to TDC. The dizzy arm was 180 degrees out - this muppet must have set it at the TDC of exhaust stroke when I fitted the dizzy. Re-assembled it all and it fired up first turn of the key.
The last update for 2008. Managed to get an early swerve from work today so used the opportunity to bed in the cam. The procedure is to run the engine for 20 minutes at 2000rpm - one sure way to test the coolant system. The good news is that the fan cut in and out and there were no major leaks. The exhaust manifold paint burnt off and the manifolds were a nice dull red colour during the running in. The idle speed and probably the timing needs sorting and also another area needs investigating. The upper air flow meter flows a lot more air than the lower one and placing ones hand over the lower one hardly affects the idle but doing the same on the upper one wants to stall the engine.